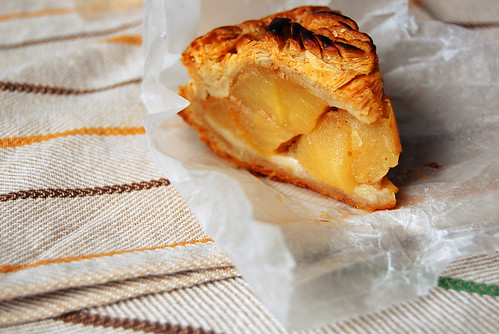
Today, we’re celebrating the classic pie. This recipe uses just enough sugar to bring out the natural sweetness in the apples, without covering it up. Since pie is so easy to make, you may want to sprinkle a bit of sugar on your apron just to show how you slaved over a hot stove to bring a homemade pie to the table. If you wish to opt for something quicker to prepare or vegan and gluten-free, try the Fruit Salad. The Classic Apple Pie is sure to be a favorite at gatherings, from Independence Day to a Thanksgiving feast. Each slice successfully boasts the natural flavor of fresh apple and the home-sweet-home taste of cinnamon. These desserts will bring new meaning to the phrase “Easy as Pie.”
This post original was published in June 2005 in New Mountain Tribune in my weekly column, Evin’s Cooking Peas & Qs. Yes, I used to have a weekly newspaper column with all my recipes. Now this recipe is being reshared here on my blog.
Apple Pie
2 refrigerated pre-made pie crusts (in the biscuit or cookie dough section of your grocery market)
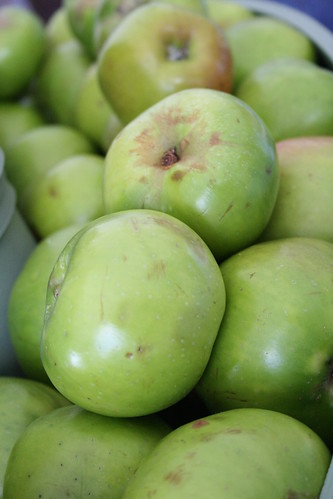
6 cups Granny Smith apple slices (peeled and cored before slicing thinly)
1 tablespoon fresh lemon juice
2/4 cup firmly packed brown sugar
1/4 cup granulated sugar
2 tablespoons all-purpose flour
1/2 teaspoon cinnamon
1/4 teaspoon ground nutmeg
2 tablespoons unsalted butter
1. Preheat oven to 450°F.
2. Let both the pie crust pastry circles warm to room temperature (do not heat rapidly to accomplish this), then place one in a 9-inch round glass or ceramic pie dish. Prepare the bottom crust according to the instructions on the package, which should require it to be baked for 10 minutes, the cooled for 10 minutes before adding the pie filling. While the crust is baking and cooling, prepare the filling.
3. Place the apple slices in a bowl and pour the lemon juice over them. Toss them together. The lemon juice will hinder the browning of the apples from being exposed to oxygen. In a separate mixing bowl, blend the brown sugar, granulated sugar, flour, cinnamon, and nutmeg in a bowl. This can be done with a hand mixer for quicker results, or with a fork. Once the ingredients are well blended, add the mixture to the apple slices and toss them together, like you would a salad.
4. Spoon the apple filling into the slightly cooled pie crust. Dot the filling with butter then add the uncooked pie crust to the top so its edges meet up with the edges of the bottom crust. Pinch the edges against the dish or the bottom crust to seal the apples inside. This increases the heat to cook the filling more evenly and efficiently. Flute the rim however you prefer it to look.
5. Cut small slits in the top crust or even be creative and cut small teardrop or heart shapes from the top pastry. This allows some steam to escape and you can keep an eye on when the filling starts bubbling.
6. Bake the pie for 15 minutes. Then reduce the oven temperature to 350 degree and bake the pie for another 45 minutes. Check often during the final 15 minutes of baking to make sure you remove the pie just when the top is starting to take on a pale brown shade and the crust edges are tan. Through the slits or openings, you should be able to see the apple filling bubbling.
7. Let the pie cool for 10 to 15 minutes before serving with cinnamon ice cream. The pie is equally good after being refrigerated and reheated briefly in the microwave. Though it is likely the pie won’t last long, its lack of preservatives give it a shelf life of 3 to 4 days, if covered and refrigerated.