This is a guest post by Katie, author of Curdled Like Cheese. She and I have known each all our lives (and our parents before us), so I’m so excited to share her post with you. Seriously, this is SO inspiring. No surprise since Katie herself inspires me.
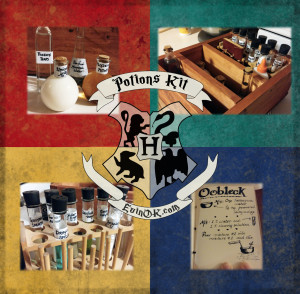
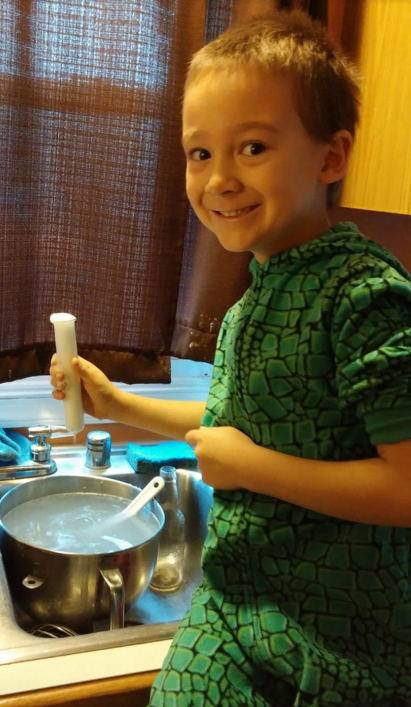
My son is six-years-old and he is of the type that likes to immerse himself in the cultures that he enjoys. He doesn’t just LIKE dragons – he has to learn everything there is to know about dragons. He doesn’t just LIKE Batman – he has to dress like Batman every time he leaves the house. He can’t just READ Harry Potter – he has to dress like Harry and eat things that Harry eats and do things that Harry does. With that in mind, I decided to build him a potions kit for Christmas this year. (Nerd Disclaimer: I wanted one of these for myself too.)
I started by thinking through some easy chemistry demonstrations that I’ve done in class. (Second Nerd Disclaimer: I’m a chemistry teacher.) I came up with a list of things that usually get a good reaction from students but don’t require dangerous chemicals:
- Adding dish soap to particles on the surface of water
- Adding dish soap to food coloring in milk (like this)
- Making oobleck
- Adding vinegar to baking soda (it foams more if you include some dish soap)
- Adding effervescent antacids to water (can be fun to add food coloring to this)
- Homemade Lava Lamp (This was something I hadn’t tried at home, but had seen on a chemistry webpage.)
- Non-Newtonian Solid or Flowing Solid
- Magic Snow
From those demonstrations, I came up with a list of supplies:
- Water, dish soap, particles to sprinkle on the surface (I chose pepper.)
- Milk, food coloring, dish soap
- water, glue, borax, food coloring
- Vinegar, baking soda, dish soap
- Water, effervescent antacids (Alka Seltzer tablets)
- water, oil, food coloring, effervescent antacids
- water, cornstarch
- Magic Snow and water
Then I started collecting bottles, test tubes and containers to use for the kit. I found an old wooden test tube rack and some large test tubes with rubber stoppers. (You can buy a set of 10 test tubes that are 20 x 150mm with stoppers here on Amazon.com and individually from Vibes & Scribes) While out shopping, I stopped at the local craft store and picked up a few glass bottles with corks for less than $1.50 a piece like at Michael’s. Or a six-pack from Vibes & Scribes. I also started collecting the supplies that I didn’t already own or that I needed to restock.
I had also found a small vial of something called Magic Snow in the grocery store for less than $1 and it’s also on Amazon.co.uk, which was supposed to expand and form “snow” when you added water, so I picked that up as well. I’ve heard about people doing this with the material that diapers are made of too.
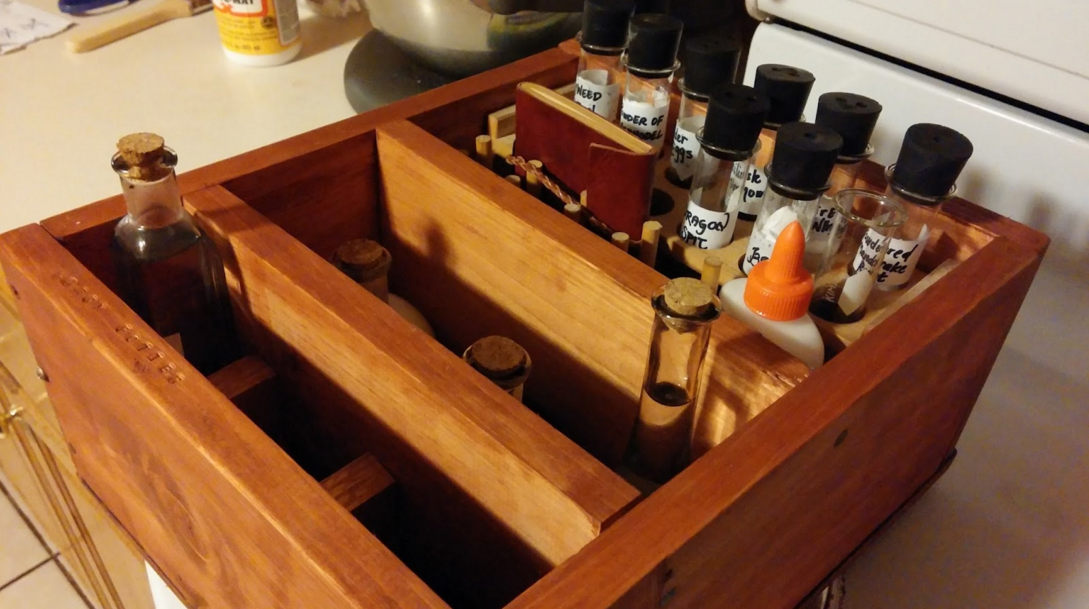
Once I had gathered all of my containers, I gave them to my husband who built a box to fit the supplies. He based the width of the box on the width of the test tube rack, which is placed on a large piece of paper to take measurements. He lined up the other bottles and containers on the paper to be sure that the box would be large enough and then bought some pine 1×6’s (like these) to build the box. He used plain plywood for the bottom of the box and some wood scraps to make short dividers to keep the bottles from sliding around. Once assembled, he sanded and stained the wood to make it pretty. We toyed with the idea of using ModPodge to attach a Hogwarts crest or some other symbol on the box, but didn’t get around to it. He did use a stamping kit to stamp “Harry Potter” into the front edge of the box.
While he built the box, I wrote out some potions recipes in a small leather notebook that my mother had found for me. Really, any small book would work – but it’s probably better for the Harry Potter imagery if the pages are unruled and the pages look aged or like parchment. Before I could really write anything though, I had to rename the materials with more Harry Potter sounding ingredients. I did some reading and some movie watching and made a list of ingredients mentioned in both. (Third Nerd Disclaimer: I enjoyed my research for this project. Immensely.) For example, in Harry’s first Potions class, Snape asks him what happens when he adds powdered root of asphodel to an infusion of wormwood, so I renamed the cornstarch “powder of asphodel.” (Fourth Nerd Disclaimer: It makes “a sleeping potion so powerful it is known as the Draught of Living Death.”)
The complete list of renamed materials was:
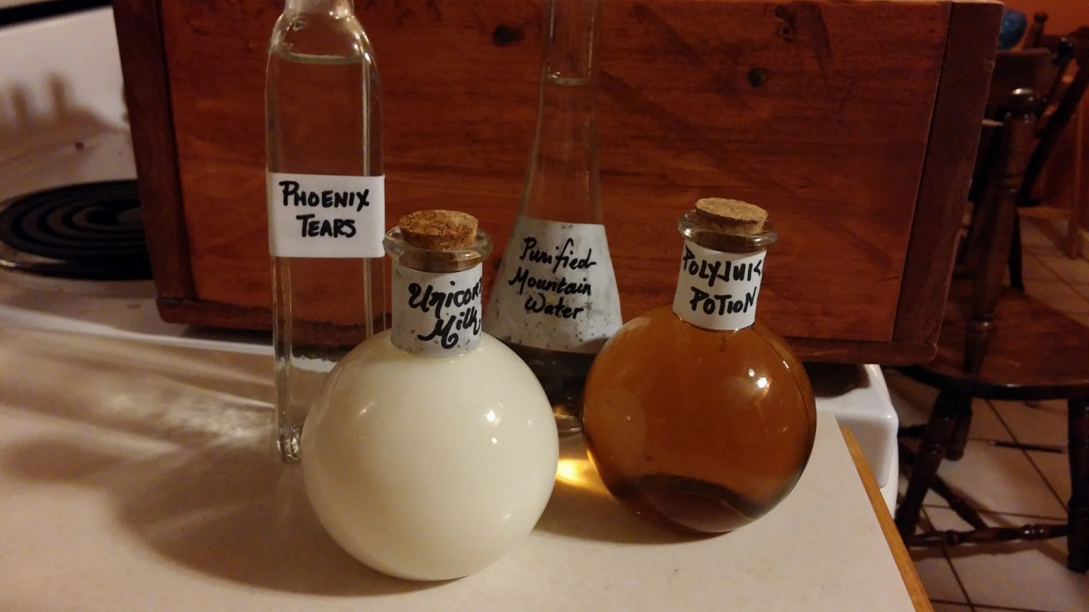
- Water – purified mountain water
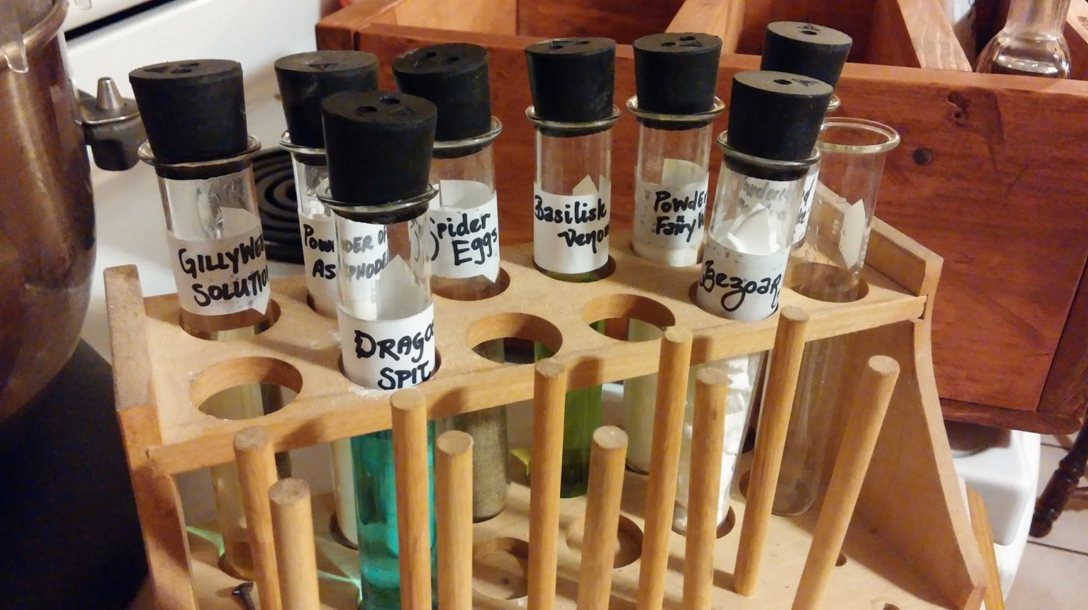
- Dish soap (green because that’s what I had on hand) – Basilisk venom
- Dish soap (blue because I wanted to add some variety) – Dragon spit
- Vinegar – Phoenix tears
- Baking soda – Powdered mandrake root
- Cornstarch – Powder of asphodel
- Food coloring – Leprechaun elixirs
- Borax – Powdered fairy wings (because of the fun sparkly optical qualities of borax)
- Pepper – Spider eggs
- Milk – Unicorn milk
- White glue – Slowing Solution
- Effervescent antacid tablets – Bezoars (also mentioned in The Sorcerer’s Stone)
- Magic Snow powder – Pixie Dust
- Oil – Gillyweed Solution
Other material names I liked but didn’t use were: Armadillo bile (from Goblet of Fire), essence of Wormwood (Sorceror’s Stone), Boomslang skin, Lacewing flies, ginger root, scarab beetles and others. The materials I chose were mostly powders and liquids so that my son would not have to worry about cutting, crushing, peeling or mashing ingredients, but that could be fun to add to the kit as he gets older.
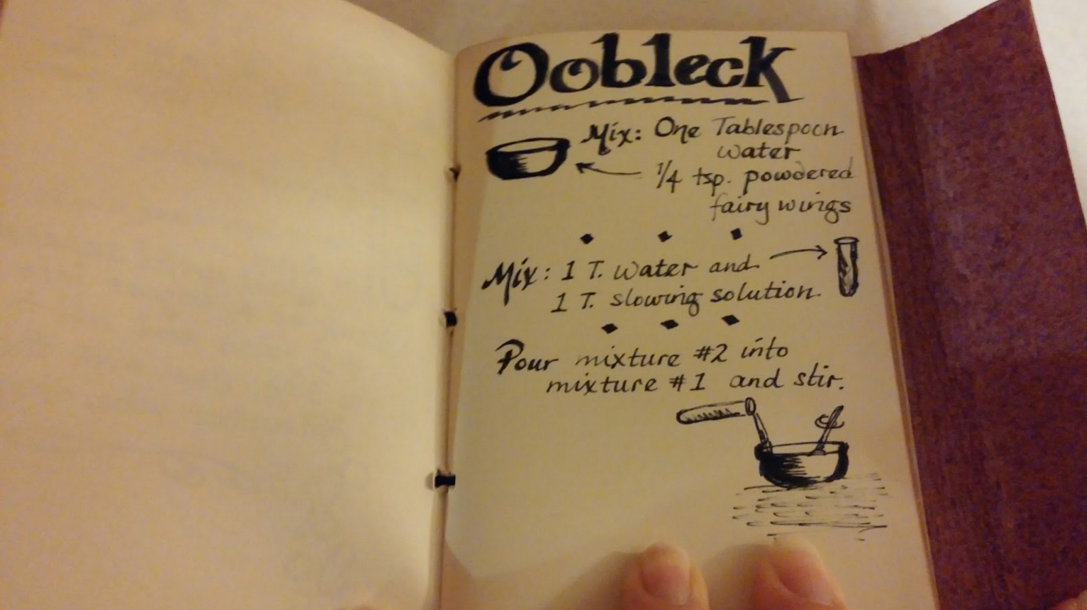
I used some calligraphy markers to make it look fancy and I tried to change up my handwriting from potion to potion. I left the back of each page blank so that there were spaces for my son to make notes about what works and what doesn’t – like Snape does in the Half Blood Prince. In fact, in some cases, I tried to make it so that he would have to write improvements. For example, in the recipe for Oobleck, drew that he should mix the borax and water in a bowl and the glue and water in a test tube, but it’s much easier to switch that because it’s hard to get the glue out of the narrow tube. I trick my students this way so they have to think about things and try to make improvements on their own. I tried to use drawings where it was helpful. There was a difficult balance between making the writing fancy and making it so that my new reader 6-year-old could still read it.
A lot of the recipes have warnings on them like: “Caution: This will be messy.” Or “Never ever put Pixie Dust in an edible potion – Pixie Dust is deadly.” (The Magic Snow material expands when it comes in contact with water, so children should NEVER ingest that! It will expand in the throat and belly and cause major issues.)
I also included one extra bottle of cream soda in his kit that I labeled “Polyjuice Potion.” If I had more time, I could have included other prepared potions like Veritaserum, Amortentia, Felix Felicis, the Draught of Living Death or Skelegrow. The internet has a lovely list of prepared potions here. Also on this site, there are written out recipes for various Harry Potter potions that have been compiled by Potter fans. I wanted my recipes to be more chemistry reactions that my son could have fun with, so I avoided using those, but a fun kit would definitely include a much larger potions list and book.
I attached paper labels to the bottles and tubes using some ModPodge (because it dries clear and I could move it around after I put it on the bottle) and arranged them in the handsome box my husband made.
Some other equipment I included in the kit:
- Measuring spoons
- Cotton swabs
- Extra rubber stoppers
- Empty test tubes
- Wooden chopsticks for stirring
Equipment that he asked for after playing for the kit for a few hours:
- A strainer
- A scoop that fit into the test tubes
Other equipment that would be fun to include:
- A cauldron
- A mortar and pestle
- Various measuring glasses (graduated cylinders, beakers, etc.)
- Glass stirring rods
- Forceps (tweezers)
- Small knife (age appropriate of course)
Potions Recipes
- “Spiders Flee before them” – A Test for Basilisk Venom Strength
- Pour pure mountain water into a dish or bowl. Sprinkle spider eggs on the surface of the water. A single drop of true basilisk venom should make the spider eggs flee to the edges of the dish. (My son was delighted to discover that dragon spit had the same effect and went on for about ten minutes discussing his theories as to why this could be true.)
- Dancing Milk
- Pour unicorn milk in a dish or bowl. Add a few drops of leprechaun elixir to the milk (I drew pictures of putting them in various places – in the center, at the top and bottom, etc. and encouraged him to try it in different ways to see which way he liked best). Dip a cotton swab in dragon spit and place the swab into the center of the dish. The milk should swirl and mix the colors together.
- Oobleck
- (See photograph above) – I encouraged him to add leprechaun elixirs to this to see how that would change it.
- Fizzing Whizbees
- Add a small scoop of powdered mandrake root to a test tube. Add 2 drops of dragon spit and pour enough phoenix tears to cover everything. Swirl the test tube to mix the materials evening. Caution: Messy!
- Exploding Filibusters
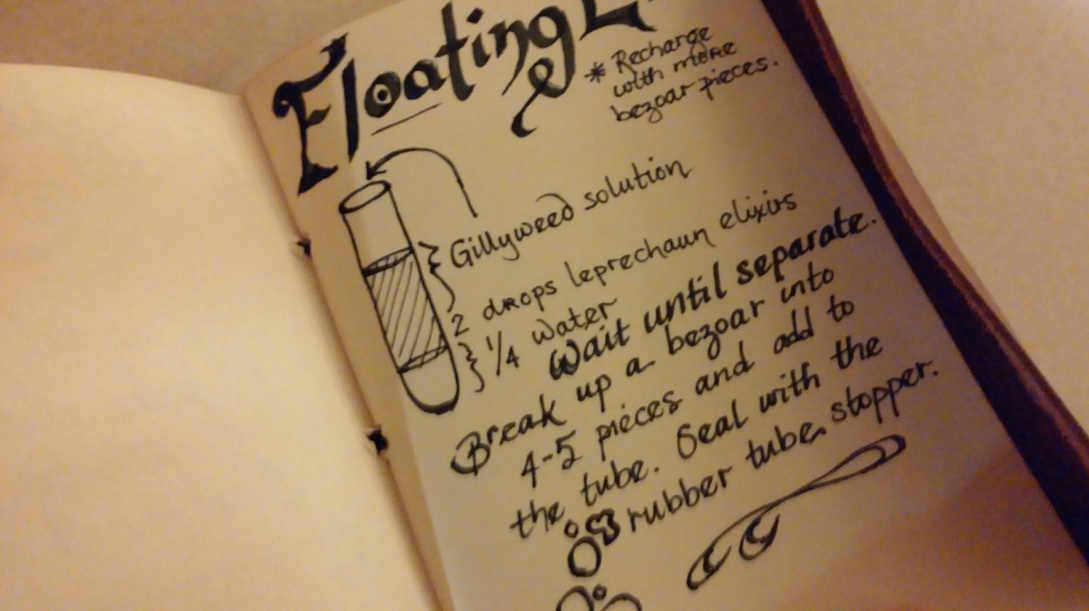
- Add three or four bezoars to a test tube. Add 2 drops of leprechaun elixirs and cover with mountain water. Try to put a rubber stopper in the test tube right after you add the water – BE SURE NOT TO POINT THE TUBE AT ANYONE!
- Floating Lava
- (See photograph above)
- Flowing Solid (AKA: Non-Newtonian Solid)
- Add equal amounts of powder of asphodel and pure mountain water to a bowl. This can be tricky to get right. It’s best to mix with your hands. Mix until the material feels solid enough to scoop off the bottom of the bowl. It should flow through your fingers when you do this. Is it a solid or a liquid?
- Magic Snow
- Add equal amounts of pixie dust and pure mountain water to a bowl or dish. Stir until all of the water as been absorbed. (Then I encouraged him to see what happens when he adds more water or leprechaun elixirs, etc.)
Again, a big part of my goal here was to work through the basic procedures with him and then let him ask questions and explore and try to make his own combinations. I designed the kit with materials that would not create dangerous compounds. We made sure to tell him that the Polyjuice Potion (remember, the bottle I filled with cream soda) was the only one that he could drink. We also advised him to keep the kit out of the reach of his younger siblings and he knows that he needs to clean up his own mess. We also gave him lots of safety pointers and a pair of safety glasses in case.
There are so many possibilities for other potions! Half the fun for me was coming up with these ideas and trying to flesh them out in magical world terms. The other half was watching my son freak out every time something happened that he didn’t expect. (Please excuse my dirty dishes…)
If you want to include an official-looking Hogwarts acceptance with the school crest go to 10 Digit Design. That’s where we got the crest we used in the design below.

Well done! My 7 (soon to be 8) y.o. is so into HP right now… I was planning on making a potions kit for her upcoming b-day and found this incredible information. Thank you so much! I’m an aromatherapist and herbalist, so herbs and essential oils will be part of her kit, too.
Brilliant. It is so fun to create something because you get to enjoy the thoughtfulness along the way. Can’t wait to hear how the kit turns out for your daughter. And love that you incorporate your expertise into it!