Last year before the whole motherhood thing happened, I felt completely worn out with a low fever so I surmised I was battling something and rested. Two days spent cuddled up under a blanket in my PJs. I knew I was feeling better when I got frustrated and bored of it. I don’t get bored. To me, boredom is a choice. It arrives on the doorstep like a chaotic houseguest and it is up to me to help it settle in and feel at home with the many joys the house has to offer and then boredom ceases to exist and is merely known as peace. After all, don’t we all wish there were more hours in the day? Then, when we are left waiting or idle we complain of boredom when really we should cherish those nuggets of quiet and inactivity for what they are – mini vacations within our modern, hectic schedules. So, how do I battle boredom when I’ve had enough peace? Well, I cheat a little.
To wage a war against boredom and win, I merely succeed at doing something. Yep, that’s it. Big secret is out. If everyone knew this, boredom and general malaise of life may be eradicated! Now you may be wondering how to make sure you succeed. Easy, set your standards and expectations aside, take on a goal or task, and DO IT. My get well boredom remedy was baking an apple pie from scratch (including the crust). I was still worn out after I rested away whatever ailed me, but needed a win to not feel like such a blob.
Though baking a pie from scratch wasn’t easy and I felt like I was crumbling when the woven top crust kept disagreeing with my efforts, I stuck with it. Soon enough, the pie was made and it was delicious! I had a success and my fleeting boredom was long gone. Of course, I didn’t need to make an apple pie from scratch to have a success, I could have just put away my clean laundry, read a book, or emptied the SPAM folder of my email, but I wanted apple pie á la mode.
This recipe is for making it with pre-made pie crusts because I needed an easy win.
Homemade Apple Pie
2 refrigerated pre-made pie crusts (in the biscuit or cookie dough section of your grocery market) or your preferred pie crust recipe
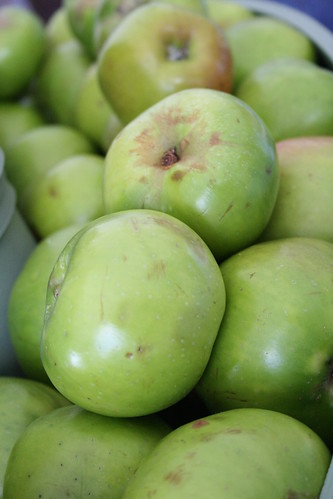
6 cups apple slices (peeled and cored before slicing thinly), I like Granny Smith or Bramley
1 tablespoon fresh lemon juice
2/4 cup firmly packed brown sugar
1/4 cup granulated sugar
2 tablespoons all-purpose flour
1/2 teaspoon cinnamon
1/4 teaspoon ground nutmeg
2 tablespoons unsalted butter
1. Preheat oven to 450°F.
2. Let both the pie crust pastry circles warm to room temperature (do not heat rapidly to accomplish this), then place one in a 9-inch round glass or ceramic pie dish. Prepare the bottom crust according to the instructions on the package, which should require it to be baked for 10 minutes, the cooled for 10 minutes before adding the pie filling. While the crust is baking and cooling, prepare the filling.
3. Place the apple slices in a bowl and pour the lemon juice over them. Toss them together. The lemon juice will hinder the browning of the apples from being exposed to oxygen. In a separate mixing bowl, blend the brown sugar, granulated sugar, flour, cinnamon, and nutmeg in a bowl. This can be done with a hand mixer for quicker results, or with a fork. Once the ingredients are well blended, add the mixture to the apple slices and toss them together, like you would a salad.
4. Spoon the apple filling into the slightly cooled pie crust. Dot the filling with butter then add the uncooked pie crust to the top so its edges meet up with the edges of the bottom crust. Pinch the edges against the dish or the bottom crust to seal the apples inside. This increases the heat to cook the filling more evenly and efficiently. Flute the rim however you prefer it to look.
5. Cut small slits in the top crust or even be creative and cut small teardrop or heart shapes from the top pastry. This allows some steam to escape and you can keep an eye on when the filling starts bubbling.
6. Bake the pie for 15 minutes. Then reduce the oven temperature to 350 degree and bake the pie for another 45 minutes. Check often during the final 15 minutes of baking to make sure you remove the pie just when the top is starting to take on a pale brown shade and the crust edges are tan. Through the slits or openings, you should be able to see the apple filling bubbling.
7. Let the pie cool for 10 to 15 minutes before serving with cinnamon ice cream. The pie is equally good after being refrigerated and reheated briefly in the microwave. Though it is likely the pie won’t last long, its lack of preservatives give it a shelf life of 3 to 4 days, if covered and refrigerated.