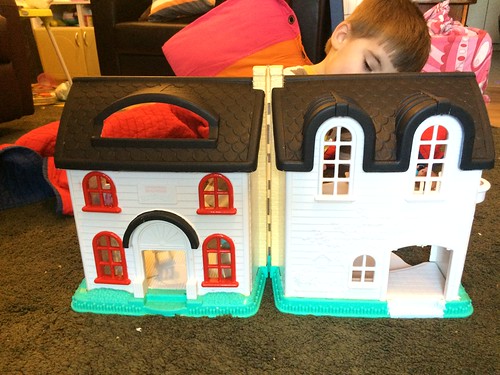
About a year or two ago, while visiting an Enable Ireland thrift store here in Cork City, my son, LB, became enamoured of a Fisher-Price dollhouse. I paid €4, but similar houses are on eBay for £5–20. LB loved it at first. The doors quickly came off so he could use the house for his toy cars (aka dinkies). But over the last six or so months, the dollhouse has been shelved more than played with. I considered donating it back to a charity shop or handing it down to another child, but any attempt to move it was met with LB’s indignation that I possessed no toy loyalty. When he prevented its departure, he then played with it briefly and I observed. He treated it like a garage and sometimes a fire station. That’s when I realised the house could take on a new purpose with a little elbow grease. So in this post, I’ll tell you how I transformed the thrift shop find into something a little more merry and bright. Let’s kick things off with a satisfying feel-good before and after to assure you this post will make you feel that DIY sense of a job well done.
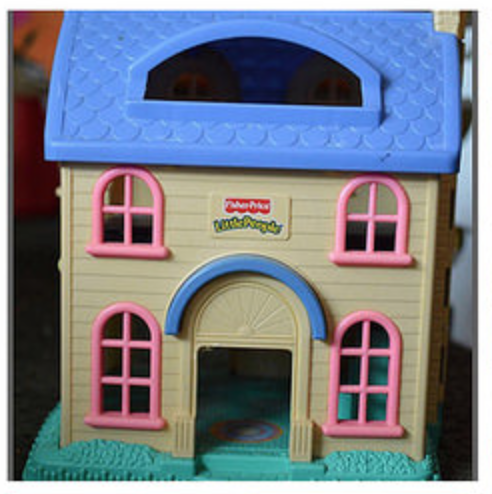
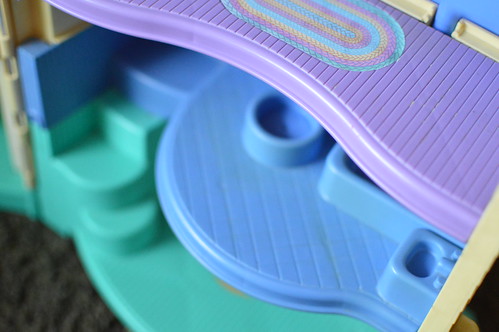
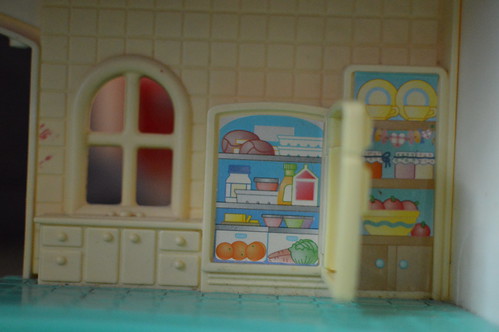
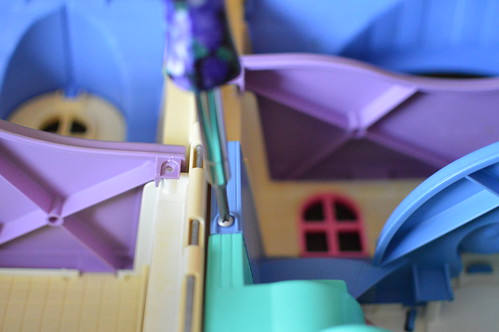
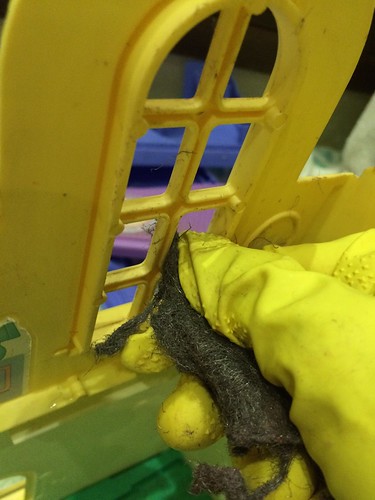
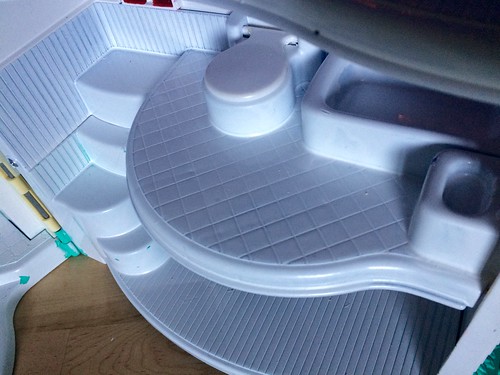
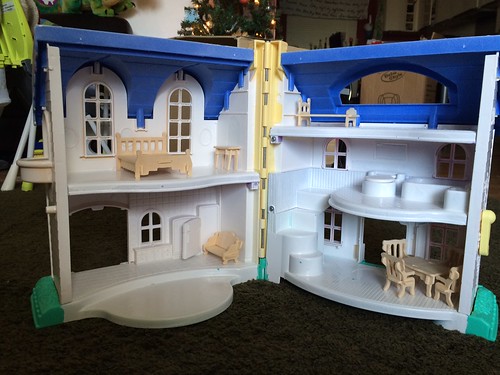
Here are more detailed photos of the original dollhouse…
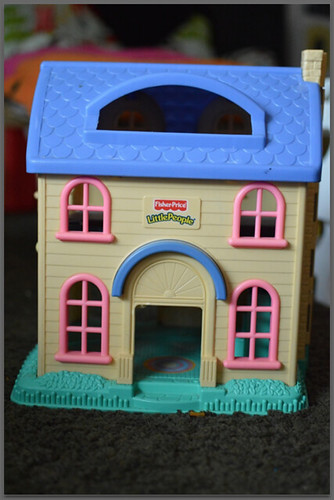


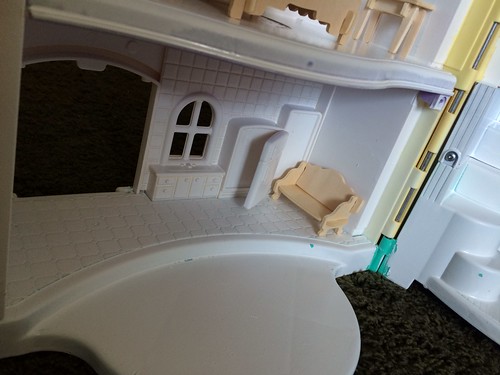
The house had a total of four coloured plastic elements. There was a blue bathroom and blue roof sections, green base flooring and “garden,” purple flooring in the bedrooms, and the walls were yellow. Oh wait, the window frames and [long gone] doors were hot pink. Honestly, if I moved into a house with those colors, I couldn’t have waited more than a week to paint it. It is widely known, I dislike the color purple.
Especially the kitchen. Some things couldn’t be changed, like the lack of subway tile.
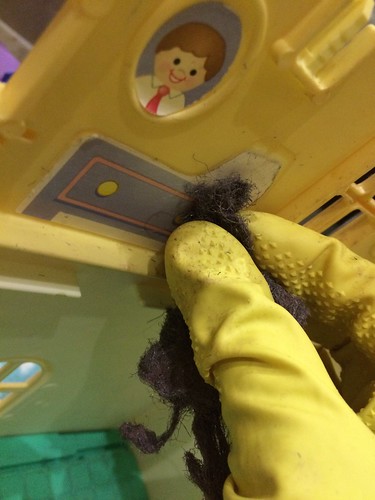
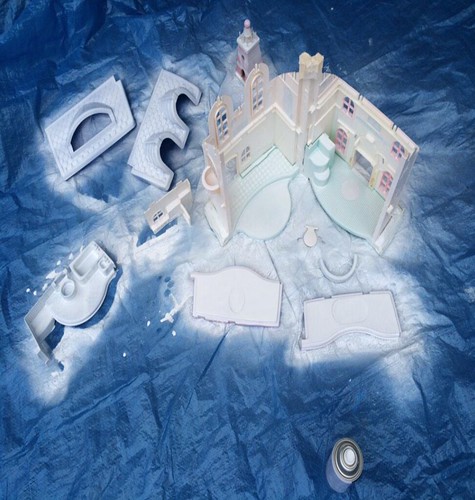
The first thing I did was disassemble the house with a screwdriver.
I then wiped down the to-be-painted surfaces with nail polish remover to take away sticky bits.
Then I used a Brillo pad to gently remove residue and the glossy finish off the elements I planned to paint. Which, to be honest, was almost every part of the house (except the undersides of the roof, floors, the garden, and the chimney.
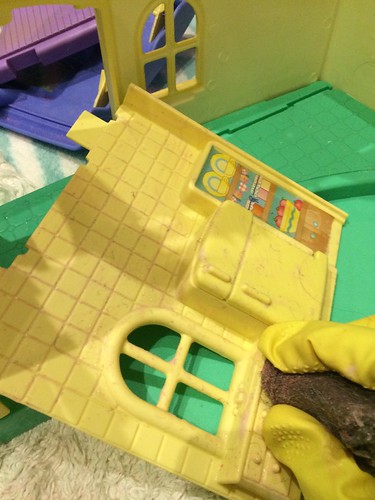
The Brillo pad scratched less than sandpaper and helped clean too. It was handy for smoothing and removing decals.
Evidently, I do windows.
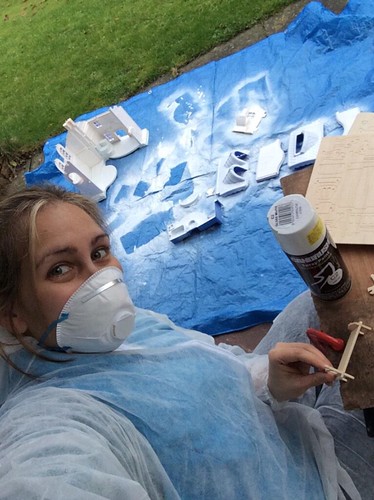
Once it was deglossed, I put the parts in the bath tub and rinsed them off. After the pieces were dry, I used masking tape to section off the chimney (and hinge) and “garden” so those would remain unpainted. Then I got to spray painting with a classic white gloss that is plastic-friendly. Each can cost €9.99 so I needed to get this done for two cans or less otherwise I’d hit the price point of having bought him a brand new firehouse. Spoiler alert: The exterior of the house could have used another two coats, but I stuck with only buying two cans.
Between the [six] light coats, I assembled the furniture. I bought a set of innovative punch-out and assemble dollhouse furnishings for £9.99. This set —> Furniture Set for Dollhouse – Woodcraft Construction Kit. It arrived and was just as promised and it was easier than expected to assemble. I originally planned to paint the pieces too, but kinda like the natural wood so am leaving it for now.
Here is a photo (not mine) of the furniture all assembled.

Preparations and cleaning took one afternoon. Spray painting took two afternoons. Then when all that was done, I spent an hour assembling it again. Here it is before I painted the roof and window trim. You can really see the difference between the original yellow color of the house and the new white when you look at the chimney beside the house’s siding. The siding really needed anther coat, but couldn’t bring myself to spend another €9.99.

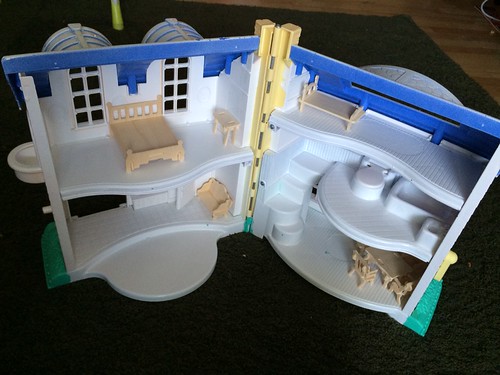
But it does look much brighter and cheerful. Did I mention I hate the color purple?

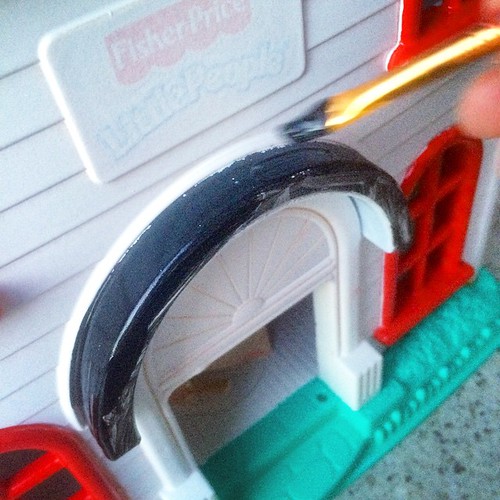
One more afternoon outside in the way too cold weather hiding behind a large box so LB couldn’t see my project before this was done. I used black chalkboard paint for the roof to give it a slate tile appearance and used Poppy Red enamel paint for the window frames to really let them pop. I used two coats of each paint on those surfaces for the desired outcome.

In hindsight, buying a new one might have been an easier approach. But my husband doesn’t call me “High Road Evin” for no reason. I tend to take the more challenging path if I think it has a more interesting view and satisfying outcome.
So about that outcome…
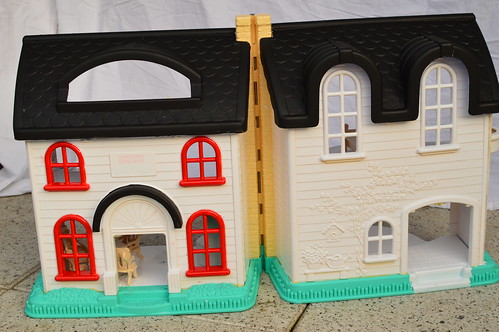

The Outside – Before
The Outside – After
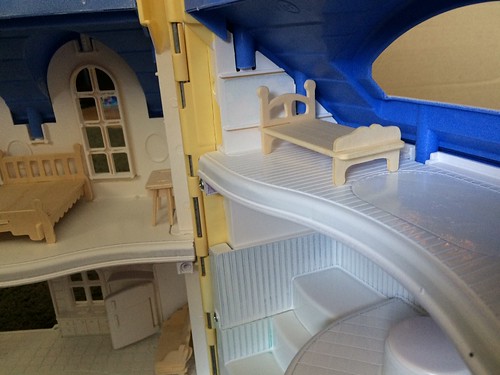
The Inside – Before
The Inside – After
And a few pictures to sum up the awesomeness of this project! I’ll be adding a Cork City Fire Brigade logo above the front door.
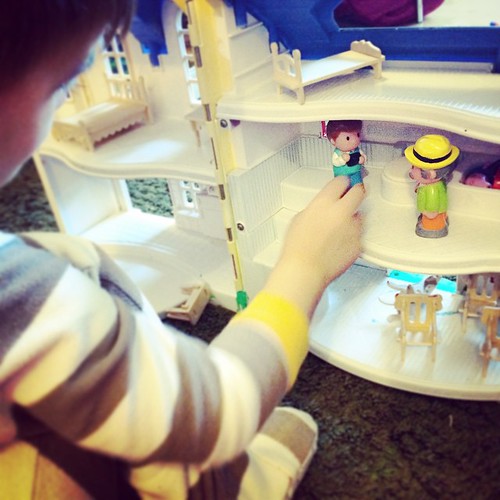
And what makes it all worthwhile? HE PLAYS WITH IT AGAIN!
What do you think? Worth the effort and time or should I have just bought a new one? Any toy renovation projects for you lately?
That’s fabulous!! I love it and never would have thought to do something like that!!!
A lot of work, but I do stuff like this too!!! Also have the husband who looks at me like I am demented!!
I don’t care, I think the kids like these toys more and they also learn how to upcycle, recycle alter stuff to improve it.