Hydrangeas are one of my favorite flowers. I carried them as my wedding bouquet and when I see them it reminds of me of that day. The plant is beloved for the stunning blooms and vibrant colors, making them a popular choice in gardens across the world. I feel very lucky that in spite of moving from DC to California to Ireland, I’ve always been in a hydrangea-supporting zone.
Last summer I learned how to propagate hydrangea plants and it is my favourite low-energy hobby. It is a bit of work at the start, then checking in on them and increasing pot sizes as needed, then planting them in the ground. Compared to parenthood, it’s a piece of cake!. I’m glad to share my process with you now, but also to document what worked for me, so I can refer to it again this summer. I’ll take you through the step-by-step process of propagating hydrangea plants from cuttings, allowing you to create new additions to your garden without purchasing more plants.

Why Propagate Hydrangea Plants from Cuttings?
If you’re looking to expand your hydrangea collection or share these beautiful plants with friends and family, propagating hydrangeas from cuttings is a cost-effective and rewarding way to do so. I also find this process to be wonderful for preserving a specific hydrangea from a family garden and bringing it to a new home. There are several advantages to propagating hydrangea plants from cuttings:
- Genetic Cloning: Propagation from cuttings ensures that the new plants will be genetically identical to the parent plant, preserving the desirable traits you love or a sentimental plant from a special place or person’s garden.
- Cost Savings: Buying mature hydrangea plants can be expensive. Propagating from cuttings is a budget-friendly way to expand your garden.
- Control over Varieties: You have the freedom to propagate specific hydrangea varieties that may not be readily available at nurseries. Keep in mind, soil determines the bloom’s color for Hydrangea macrophylla and Hydrangea serrata. Very acidic soil (pH < 6) turns flowers blue (you can add coffee grounds to the soil to encourage this). Flowers in alkaline soil (pH > 7) turn shades of pink (regularly add dolomitic lime for this result). The magic in-between of mildly acidic or neutral soil (pH 6–7) encourages blooms ranging from purple to blue and pink in a single plant.
- Personal Satisfaction: Propagating plants from cuttings can be a fulfilling and enjoyable gardening activity. I like to kick off the process cackling like a mad scientist, but only for a few seconds as to not worry my neighbours.

Round One: Trial and Error
Before I really knew how to propagate hydrangea plants the ‘right’ way, I cut big stalks and stuck them in a pot. After posting a video on Instagram & TikTok about this process, a couple friends reached out to me with their advice and I was so grateful to improve how I did things. I learned a lot from this round, especially that blooms must be cut off for better success. I used 30 cuttings with rooting powder then watered with a rooting liquid after two weeks. Twenty plants from that time grew roots initially and of those about 10 grew to be healthy plants!
Round Two: New & Improved
The second round, I had 13 from the first batch still brewing (spoiler, only 10 survived a late frost) and added in 77 more. The greenhouse was full! With the second batch, I was careful to follow my friends’ advice.
Round Three: Finely Tuned
It took a year and some trial and error, but this is now how I propagate hydrangeas.
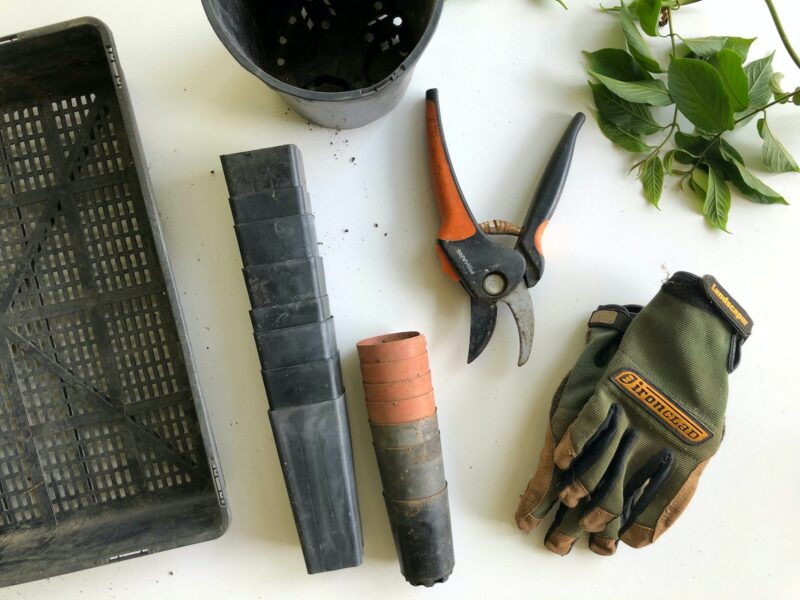
Materials Needed:
- Pruning shears or sharp scissors.
- Healthy hydrangea plant (the parent plant) – this can be multiple plants.
- Potting mix or a mixture of peat and perlite.
- Small pots or containers. I repurpose clear ‘single-use’ plastic containers (like from soup, iced lattes, cotton candy, etc).
- Rooting hormone powder (optional).
- Clear plastic bags or plastic wrap (or same size clear container as a lid).
- Rubber bands or twist ties.
- A misting spray bottle.
- A warm, bright location for your cuttings.
Steps:
- Select the Right Time:
- The best time to take hydrangea cuttings is during the late spring or early summer when the plant is actively growing. However, I also found success trimming at the start of September and putting them in my greenhouse then bringing them inside before the first frost. This isn’t ideal though from a housekeeping standpoint so this year, I did this process then wrapped the base of the containers in clear bubble wrap multiple times then placed that in a larger pot in my greenhouse. We will see how that goes.
- Choose Healthy Branches:
- Identify healthy branches with no signs of disease or pests. Ideally, select branches that are not currently flowering.
- Take Cuttings:
- Use sharp pruning shears or scissors to cut a 4-6 inch stem just below a leaf node (where a leaf is attached). Remove any and all lower leaves from the cutting, leaving only 2–3 leaves at the top. It should not have any blooms on it. I often cut the tips of the remaining leaves off to keep the stem’s hydration and energy in the stem.
- Optional: Use Rooting Hormone:
- Dip the cut end of each stem into rooting hormone to promote root development. This step is optional, but I found it to increase the success rate.
- Prepare Potting Mix:
- Fill small pots or containers with a potting mix or a mixture of peat and perlite, creating a well-draining medium for your cuttings.
- Plant Cuttings:
- Insert the cuttings into the potting mix, making sure they are at least 2 in / 5 cm deep. Space the cuttings apart to allow for proper air circulation.
- Cover and Enclose:
- If you do not have a greenhouse for them to rest for a couple months, you will need to give them the same level of light and warmth in another way. To create a greenhouse-like environment, cover the pots with plastic bags or plastic wrap. Secure them in place with rubber bands or twist ties. I used this approach once and didn’t like the single-use plastic waste, so I opted to reuse McDonald’s lemonade cups and lids. I put a piece of tape over the straw hole to hold in the warmth and moisture.
- Mist and Maintain:
- Place the pots in a warm, bright location with indirect sunlight. Mist the cuttings regularly to keep the humidity levels high within the enclosed environment.
- Monitor Growth:
- Over the next few weeks, monitor your cuttings for signs of root growth. You can gently tug on the cutting to check for resistance, indicating root development.
- Transplant When Ready:
- Once the cuttings have developed strong roots (usually in 6-8 weeks), you can transplant them into your garden or larger pots.
It is a wonderful way to grow new plants that inherit the beauty and traits of their parent. With a little patience and care, you can successfully create multiple hydrangea plants to enhance your garden or share with fellow gardening enthusiasts. Enjoy watching your propagated hydrangeas flourish and bloom, adding natural beauty to your outdoor space. Happy gardening!
My cuttings grew roots by putting cuttings in water.
Amazing! My water dries out or gets knocked over, so this solution works better for my lifestyle. But I LOVE that just water works for you. This approach has worked for me for other plants that root quicker.
When you used mcdonalds cup, did you plant in the cup? Using the lid for the cover? thank you
I plant in the cup then use the lid to create a greenhouse environment. Because it gets rather cold here in winter, I also wrap the cup in bubble wrap and put that within a larger empty flower pot in my greenhouse outside. The lid keeps the moisture inside so it doesn’t dry out, though I do still check on it occasionally.
Full transparency, the hydrangea clippings I propagated indoors last winter grew bigger and stronger than the ones I left in the greenhouse over winter.