It’s a beautiful snow day here in Cork, so I wanted to share a classic tutorial for making paper snowflakes. This is one of my favorite quick crafts and a good way for younger children to practice scissor skills. Quick crafts are ideal with items you have on-hand, like printer paper, crayons, cookie cutters used as stencils, etc…
One of my friends recently confessed that she loves the idea of making them but is intimidated, so I thought it was a great back-to-basics craft to profile. As you’d imagine, I’m the friend that hears all the “I wish I was crafty” confessions and by the end of it, I have convinced them they are! So, let’s make paper snowflakes!

I gathered my son and two nephews together and we sat down with our supplies to make our snowflakes during one of those in-between moments.
The Supplies:
Scissors (child-safe scissors for the kiddies)
White printer paper

The Process:
To create your own one-of-a-kind snowflake, you need to know how to fold and cut paper. For smaller kids, you can do the folding then provide them with a pencil to mark where you should cut. This helps avoid accidents with scissors and small hands.
Let’s make paper snowflakes!
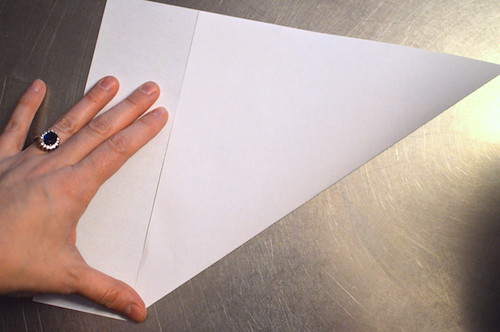
1. Fold your standard printer paper to create a square and cut the extra strip off the end. Keep the square folded as a triangle.

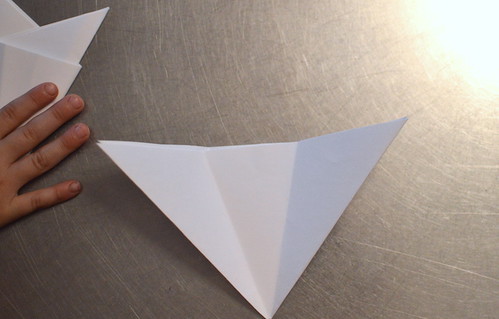
2. Take your triangle and fold it in half again. Fold that smaller triangle then into thirds. It will look like it should hold a bouquet of flowers.
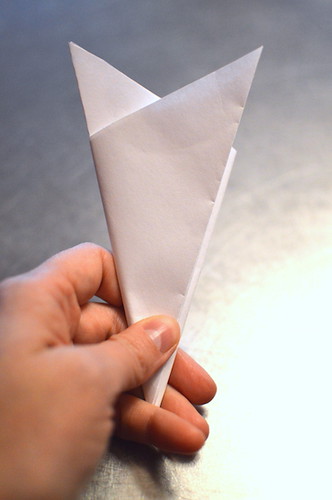
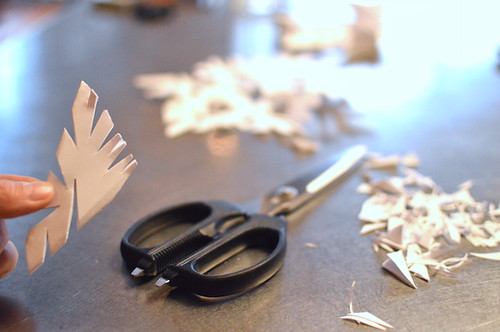
3. Cut across to snip off the spiky ends of the triangle in a diagonal motion. Mind the fingers!
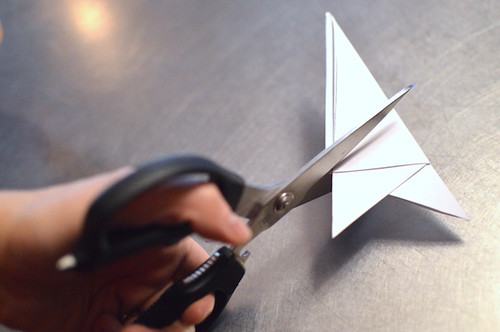
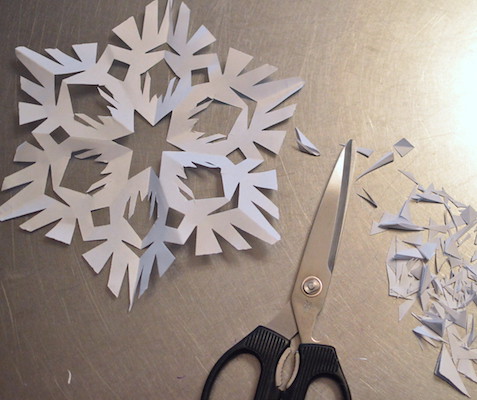
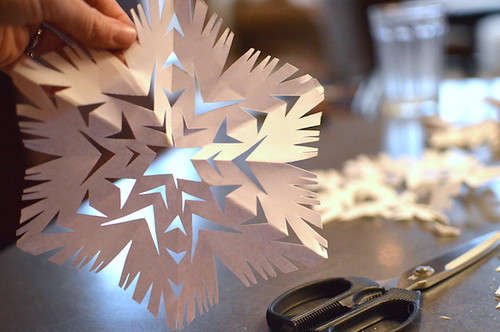
4. Now that you have your snowflake shape ready, time to cut the openings that will give you the one-of-a-kind shape of YOUR snowflake. Cut out triangles and snippets from the folded paper. Each cut, however small, creates a repeated opening within the snowflake shape. No matter what you do, it will look consistent and let light through to give it a snowflake look.
Here is a diagram of how cutting in certain places will look on a final snowflake. It is part of a tutorial on Martha Stewart’s site. She even has free printable snowflake templates. There is also this tutorial with printable on TheBestIdeasForKids.
5. Once you’ve cut as much as you wish, sweep up the trimmings to recycle and open your folded paper to see what your final snowflake looks like.
6. The finished snowflakes can be taped to a window to let light through or placed on the Christmas tree.
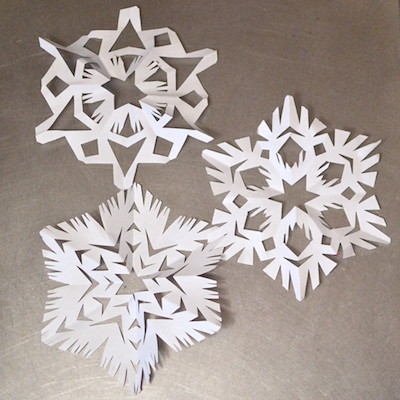
Here are photos of our finished snowflakes that my nephews, son, and I made today!
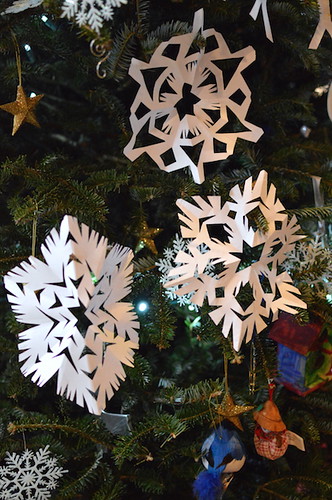
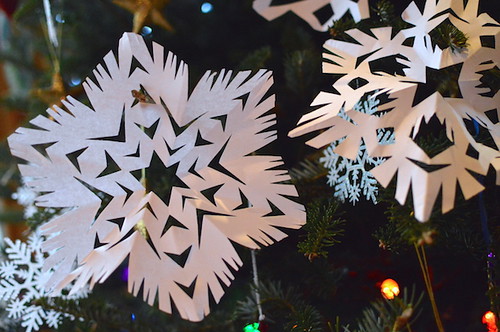
We did all this in about 30 minutes, which was exactly the time my mother-in-law needed to prepare ingredients for baking with the boys.
The paper idea came from the #ChristmasCraftChallenge Viking has online at the moment. You can read all about it and get a few ideas from their site HERE. They invited me to participate and I couldn’t resist a crafty adventure. Because what could be more fun than figuring out a way to use office supplies to make Christmas decorations?! I know, right! I browsed their site and they have everything. Thankfully, they gave me a little money (<— disclosure) to buy supplies and told me to dream big.