Winter is coming and I am going to miss my terrace garden, so I decided to bring a bit of the outdoors in by creating my own little garden in a jar. After reading a few Pinterest tutorials, I decided to try to make it with entirely things I owned, except I needed to buy a new larger jar. Here is my simple tutorial on how to make your own terrarium made with upcycled materials. This was partially inspired by a Teamwork.com blog post about how indoor plants are healthy and beneficial.
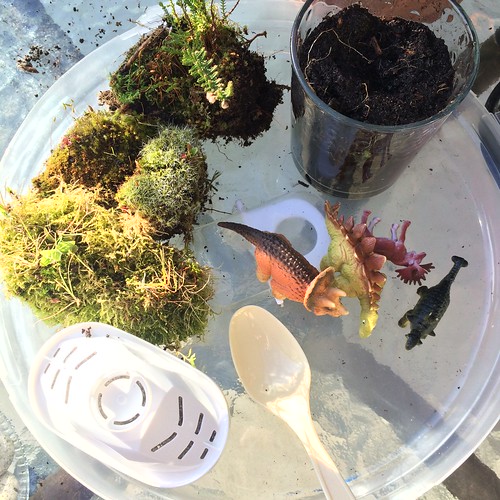
What I used to make this terrarium:
• Medium to large glass jar that closes (the only thing I bought for this project because I didn’t have a spare one not in use at home – I reuse my jars like crazy)
• Rocks/pebbles the size of Peanut M&Ms
• A used Brita water filter, cut open carefully
• Soil from a parsley plant I bought that died
• Spoon for transferring the soil and putting things in place
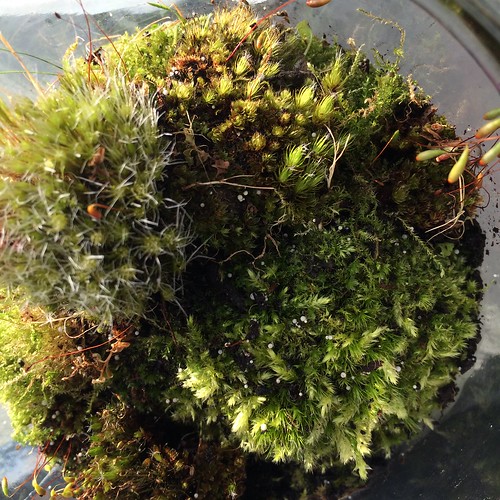
• Moss and little ferns or plants or seedlings that at full size will suit the jar capacity
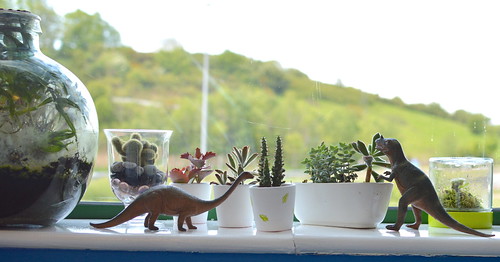
• Little dinosaurs for decoration (optional)
For this post, I am showing it made in the jar itself because it shows the layers better. Having said that, I actually redid it for myself after and build the terrarium into the lid of the jar so the lid looks like a nice base. You can see how that works in the final photo. The process is the same, you just build it in the lid and must be more careful when screwing the jar closed at the end.
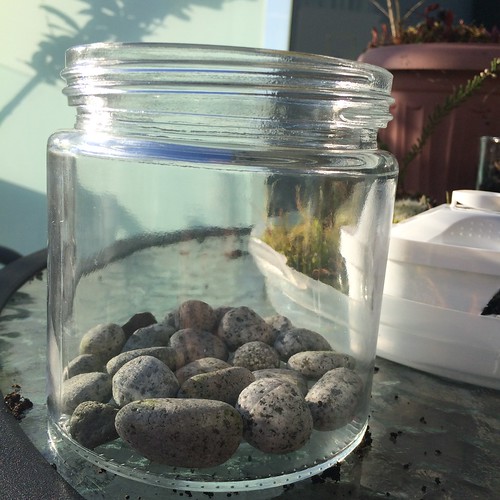
1. The first step is to place the rocks or pebbles into the bottom as the initial layer.
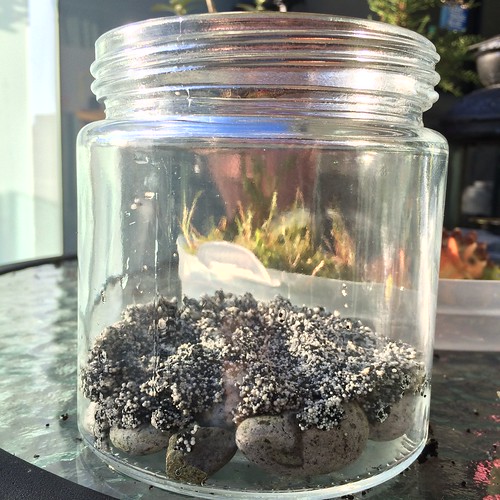
2. Spread on a layer of the charcoal mixture from the used Brita filter. Alternative charcoal can be used if you prefer, but I chose this because I had it handy and it would have just been thrown away otherwise (love me some upcycling).
3. On top of the charcoal, I placed the soil. I added little hills for visual interest and also it meant I could put more surface area inside the jar. Then on top of the soil I placed little sections of moss and vegetation that was growing wild in flower pots on my terrace. The fact the items were volunteers and surviving without upkeep encouraged me they could survive in a jar. 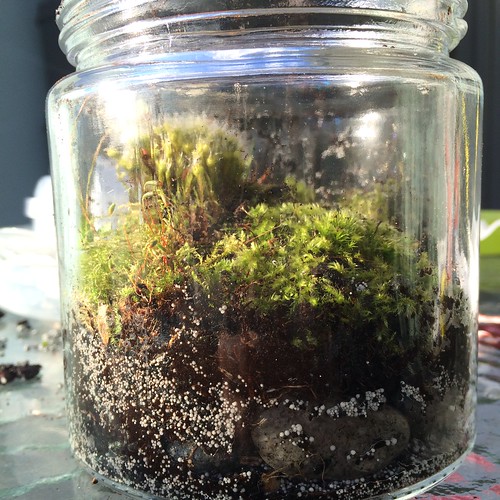
4. I adjusted the design to make sure the taller bits were not all around the edges for prime visibility. Then I closed the jar and called it a day, while crossing my fingers.
Seven weeks later, this is what the terrarium looked like. Keep in mind, I redid it and flipped it so the lid appeared to be a base. It is in my office window (hence the view of my work laptop and cheerful Teamwork.com logo behind it there) which enjoys plentiful sunshine without getting full sun all day.

Doesn’t it look happy in my office windowsill? The large terrarium on the left was created in the 1970s by a friend.
Have you made a terrarium yet?