I have been looking for a basic backpack to use for when I need to carry a bit extra for myself and the kids, but don’t want my purse to feel like I borrowed it from Hermione Granger. I usually carry a canvas tote bag for the extras, but that just isn’t comfortable and I’d rather have something a bit prettier.
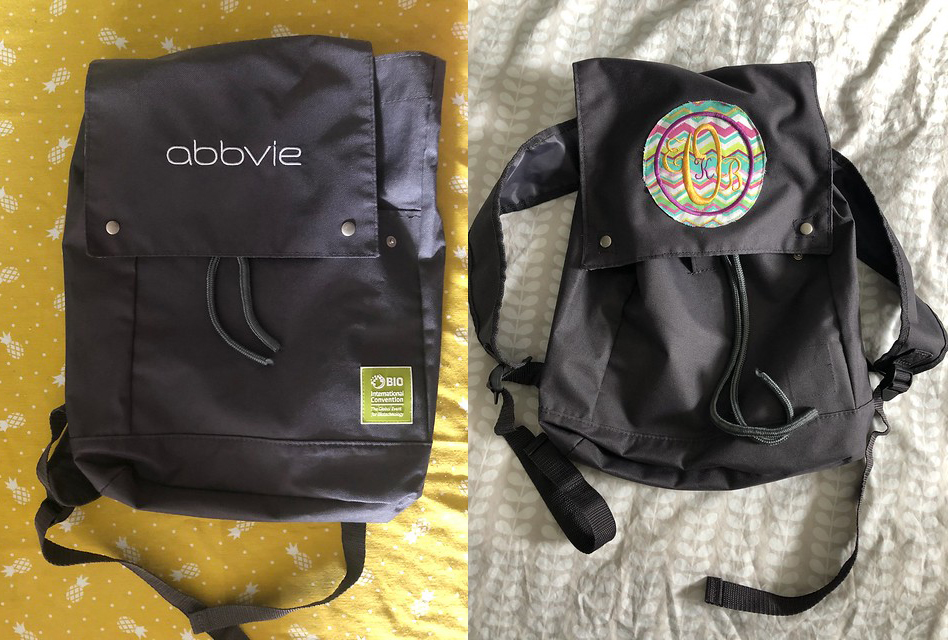
So, I kept an eye out, then one day I found a basic grey drawstring backpack. It wasn’t made for school books or backpacking. It isn’t secure enough to be a purse, but it would work for this. The bag was from a conference event, which meant it had a sewn-on brand patch, a sponsor’s name embroidered on the flap, and the inside of the flap was lined with logo-printed fabric. It was in need of some updating, but for €3.90, I was up to the task. Worst-case scenario, it didn’t work out but I had a handy bag for colouring books and crayons.
Materials
- Thrifted backpack
- Silver Sharpee (to color over embroidery)
- Sewing supplies
- Fabric
- Monogram patch (made by my friend Laura who made me this blouse)
Approach
The backpack didn’t need TOO much work. It was in good shape and a nice neutral color. These are the before photos.
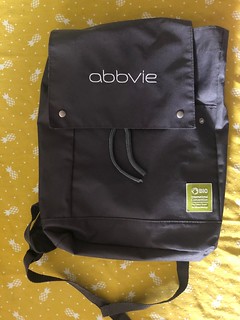


The only thing was that the branding needed to go. No offense, but if I didn’t have something to do with an event, branded swag means a little less to me.


I looked in my fabric collection and brainstormed how to personalise this bag in a way that is both useful, appealing, and cohesive. Maybe a big Spider-man patch on the flap then Spider-man fabric inside the flap? Or Seahawks? Seahawks was the frontrunner for quite a while until I remembered my friend Laura made me custom monogram patches a few years ago and I treasure them too to have used them all already. The decision was made.
I found coordinating fabric that went with the patch without matching in an annoying way. With that selected, I dove into the project with both hands!

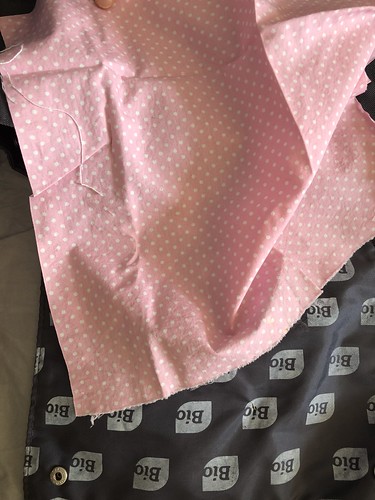
I measured the flap lining fabric to be about 1/3-inch larger on every side than the flap so I could fold it under for a nice edge.

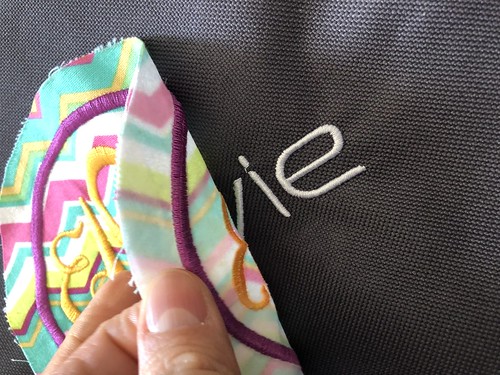
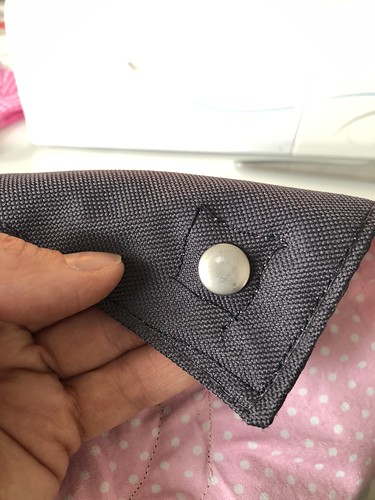
The first thing to go was the conference patch. I am certain it was a well-planned and memorable event…for those who attended, but it wasn’t for me.

The embroidered sponsor’s name was in white thread on the grey backpack, so I used a silver Sharpie to color in the letters so they don’t stand out. A black Sharpie would have been too dark for this. You can see the patch is just a smidgen smaller than the width of the sponsor’s logo/name, so the grey helped tone it down.
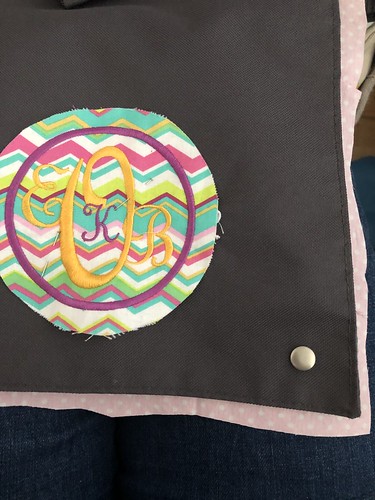

I pinned the monogram patch in place to be sewn later.
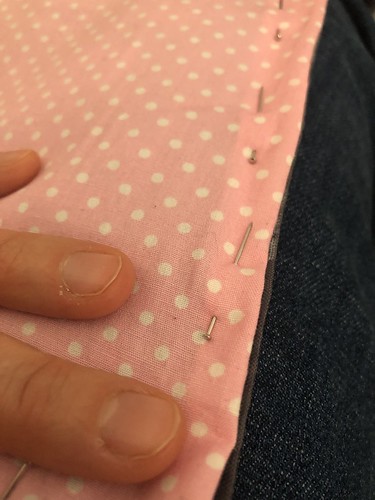
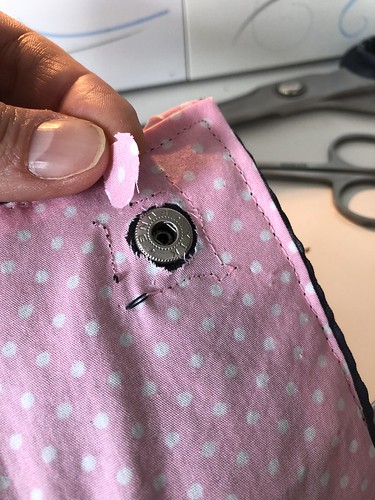
I then pinned the fabric for the inside of the flap so it was in place up to the edge. I was tempted (still am) to do a bias tape edge in orange or something fun to give it more personality. I’ll update you if that happens.

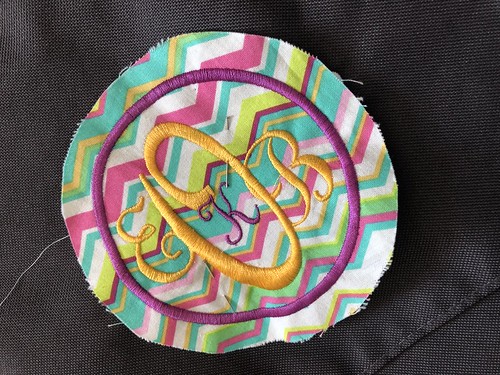
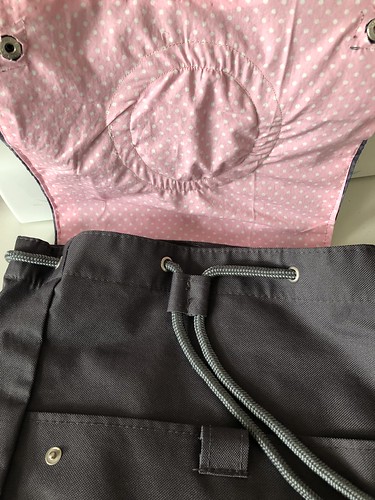
The first thing to be sewn was the monogram patch. I ewed the inside of the circle just beyond the letters as well as the outside edge. I used white thread for this part.

Following that, I switched the bobbin and spool so they were ready for the inside flap fabric. I was sewing from the outside (grey) and the underside (pink) was the inside of the flap. So, the spool was a dark grey thread and the bobbin was a pale pink thread.


Somehow, this worked better than I could have imagined.
As I sewed the edge of the bag, I removed the pins holding the pink fabric in place. It went without issue.

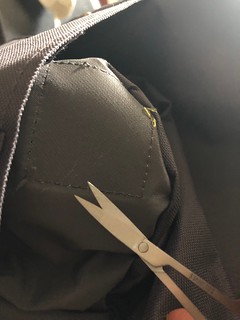
There were the snaps to deal with next. I sewed a square around the snaps in the same way as the lining (grey/pink). Next, I needed to trim the pink fabric over the snaps of the flap so they could connect with the body of the bag. Tiny scissors were perfect for this.


It isn’t a graceful solution, but it works.

Result
Better than before, that’s for sure!


Part of me wanted to do more circles to accentuate the pattern from the patch, but I also know sometimes less is more. Overall, I’m very pleased with the inside of the flap for being a bit brighter.
I’ll admit, even with this project done, I may revisit it later to pad the backpack straps, but this is what I’ve done so far and I’m thrilled with the result. Maybe the bias tape edging on the flap or maybe something on the ends of the drawstrings, but something else to cheer the bag up from the grey-ness.
One last before and after photo.